Ten Things To Know About Using Images On Your Blog

1 // Images bring your blog posts to life!
They pull the reader in, draw the eye down the page, and help tell your story. They make your content more enjoyable. They give your "skimmers" a quick way to engage with your post. They can boost your SEO.
2 // Be legal.
You can't just copy and paste images from the internet to your blog. This is a big no-no because you will most likely violate copyright laws. Learn the in's and out's of that right here. Instead, you'll want to purchase royalty free images from a reputable source like istock or Shutterstock. OR use images from a free source (making sure you follow the photographer's terms of use).
4 // Do not use tiny and low resolution images.
Crummy photos will compromise your brand. Mobile phone images can work just fine, but you need to develop this skill or your photos will be a blurry mess. Here are some creative tips for taking great shots with your iphone.
If I have to use a a lower quality image, I try to give it a creative feel by turning it black and white or using filters. Have you seen Taylor Swift's 1989 album? The whole thing is branded using creatively filtered photography which gives her packaging a really intimate feel.

Taken with my iphone. Is it a perfect photo? NO. But you can't let your quest for perfection stop you from taking action with your blog. If creatively filtered photos are good enough for Miss Taylor, they can work for me too:) A creatively filtered iphone photo is way better than a low resolution (or tiny file) camera photo.
5 // Name your photos.
People Google-search images. If your photos aren't named you miss out on this opportunity.
In the photo below, A. is where you'll name your photos on the backend of your Squarespace website:

6 // Images make great buttons!
All you need to do is add a Clickthrough URL. In the photo above, B. is where you'll add your clickthrough link on the backend of your Squarespace website.
7 // Add captions.
While I don't usually add captions to my photos, many experts recommend it because captions give you yet another opportunity to bake some keywords into your content and enhance your Squarespace SEO.
8 // Big photo files can slow the load time of your website.
Luckily Squarespace optimizes image file sizes for us. HIGH FIVE!
9 // Don't be afraid to create your own images.
I have clients who adore Picmonkey. However, I favor Canva when I'm not using Illustrator or Photoshop (which you can rent right here).
My amazing business buddy, Amber (of the yummy food + recipe + nutrition site Stirlist), turned me onto Word Swag recently. It's a mobile app that I know I'm going to enjoy using as I move through my online intimacy issues in 2015 (thank God for business buddies who call you out on your silly excuses!) Not to weird you out, but I'm Deana Ward and I struggle with online intimacy (also known as social media).
10 // Don't forget to add a watermark.
You want people to share your images on their social platforms, right? (The answer is YES!). Make sure your website url is clearly visible (but not obnoxiously distractive) on your photos so people know where to find you if they want more information about what you offer.
11 // BONUS TIP! Add a main image to the top of your post AND a thumbnail image to accompany your excerpts.
I always create a main image for my blog articles. It's the first thing readers see before they read my posts. The reason for this? Go back to #1 on our list:) Another reason I do this is because I consider it my post's digital calling card around the internet. When I share my posts on Pinterest, Google+, or Facebook, this image accompanies the shares.
In addition, I always add a thumbnail image to each post. This is super important (and oftern overlooked) because your thumbnails represent your posts in searches both on and off your site.
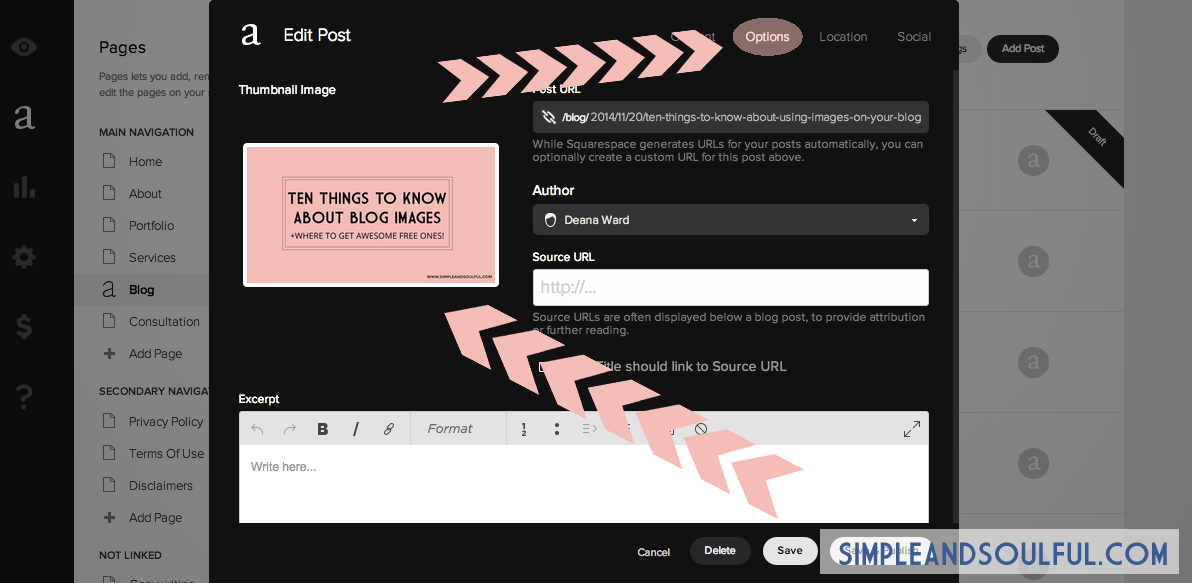
Here's where you'll add a thumbnail image to a blog post on the backend of your Squarespace site: